Thursday, April 28, 2011

Failure! And trying again...

Uck.

I misread my glaze notes, and applied too much glaze to...... eight, ten, twelve pieces?  Large platters, bowls, tea cups.... I don't want to remember.  Total waste of time and effort and I ruined shelves.  Frustrating! The pile of failures is banished to Piers's woodworking area of the garage.  Maybe I'll smash them, maybe I'll ignore them some more.  Grrrr.

I'm extraordinarily thankful to my sweet partner for being calm and supportive.  Yes, I feel like I was careless and destroyed my work unnecessarily.  I also simply love working in clay, and that's where my passion and drive stem from.

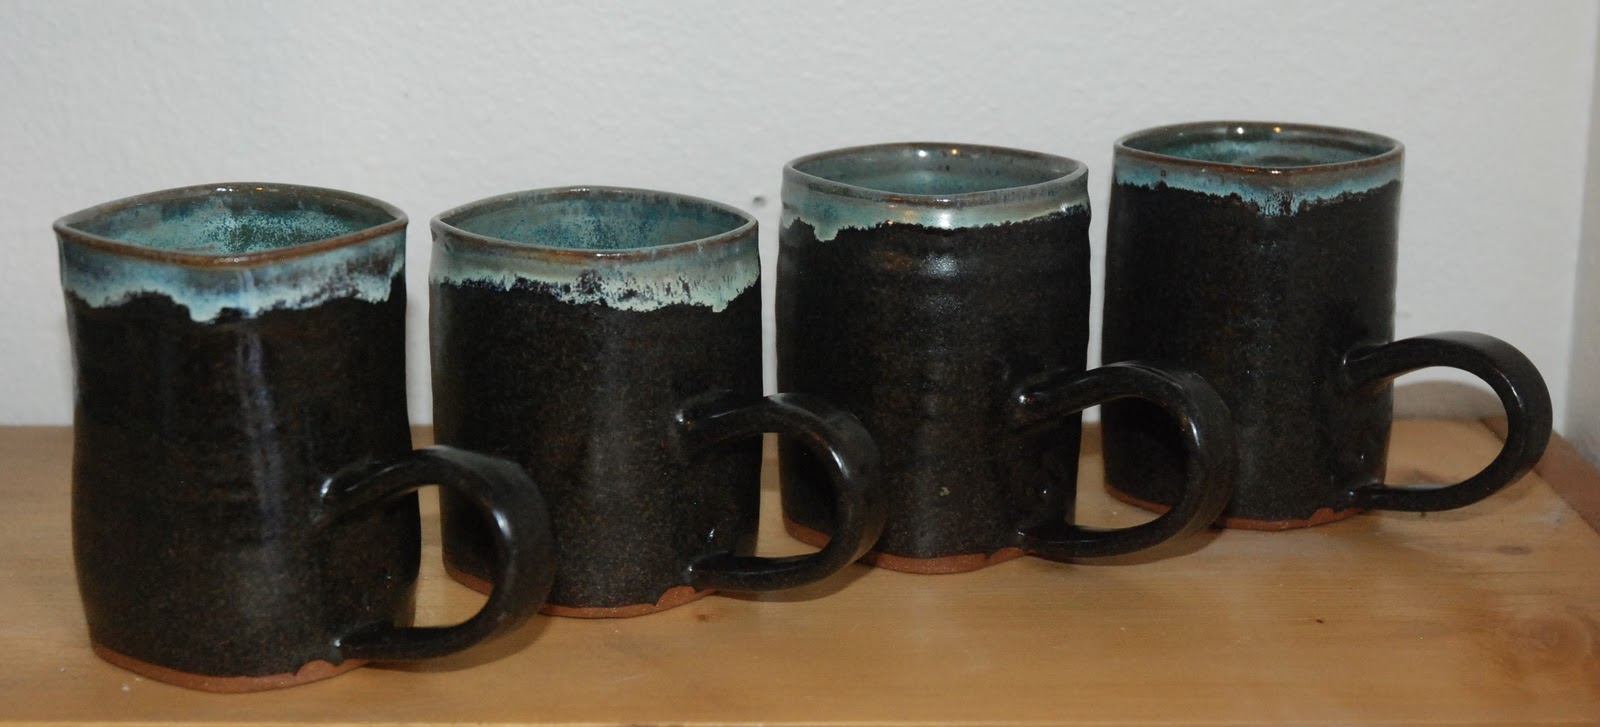
So I've taken a deep breath (many deep breaths) and wedged some new clay.  Here's some work fresh out of the kiln:


More work is being glazed, and I have greenware drying slowly in my studio.  I'll post new pictures after the next glaze load (gulp!) .....Keep your chin up, girl!!

Monday, April 11, 2011

Where Mugs Come From

We all know where babies come from.  But what about mugs?  And why does it take me so darn long to make the ones for the Corral?  My husband and his brother documented some of the process for my most labor-intensive mugs.

Step One: Make clay
Since I've switched clays, I don't buy any more of this gray clay (and I can't use my new red clay to make these mugs because the glaze color doesn't turn out the same), so I reconstitute it from my bucket of slop. Here I've scooped out as much wet clay as the plaster bat can handle.  I let this dry for a day and a half in my studio.  The top air-dries, and the bottom has moisture sucked up by the plaster, so I'm left with a crunchy cookie that's still mushy on the inside.

Step Two: Prep clay for throwing
Now it's time to wedge the clay cookie, mixing together the drier and wetter parts until it reaches an even consistency.  I let it dry for several more hours until it's stiffer and ready to be thrown on the wheel, then weigh out the clay into 1 1/4 lb balls.

Step Three: Throw mugs; Step Four, Trim the bottom

Here I've thrown six mug forms, and allowed them to dry enough for me to trim the bottom.  To keep the clay bodies from mixing, I've flipped the bat on my wheelhead (from the red clay side to the gray clay side), and set out a large plastic bag to catch my gray clay trimmings.  I guess I've been keeping a lot of trimmings--that pile should really go back into my slop bucket.

I center the mug form, and secure it with wet clay (above), then trim away excess clay and shape the bottom with a trimming tool (below).

Step Four continued, since Steps Five through Seven are missing...
Okay, so there aren't any photos of me making handles, letting the handles dry, stamping each mug body, and attaching the handles.  You'll have to use your imagination for those steps.
 
Step Eight: Bisque; Step Nine: Underglaze
Once the mugs are fully assembled, I let them dry completely, then bisque them to around 1950 degrees.  After the kiln cools overnight, I apply three coats of black underglaze to the stamped logo area, using my small brush.  Then the mugs go back in the kiln for a second bisque.  The underglaze becomes shiny and permanent, and I can keep it separate from the brown glaze that goes over the entire mug.

By the way, I want to point out the plant in the background, above.  It's either a lemon, grapefruit, or orange plant; my husband can't remember what he was eating when he planted the seed, since he never expected it to sprout.  At this rate, we'll have a full-fledged tree gracing our living room in, say, ten years.  How exciting!

Step Ten: Second bisque, Step Eleven: Detailed glaze area
For the glazing, I apply three coats with my small brush, around all the detail of the logo.  I enjoy this sort of work; when I have to paint a room, I prefer the edging and trim work instead of the roller application.  After the detailed areas are done, I grab a large brush and apply three coats inside and out.  Whew!  Back in the kiln for a glaze firing, around 2230 degrees.

My pottery is microwave- and dishwasher-safe.  I think everything tastes better when it's served in a ceramic or glass container.  Especially when it's handmade!  I love the special moment you feel when you pour your drink into a handmade cup, enjoying touch, taste, smell, sight; a lovely indulgence in Life.


The next morning, I open the kiln to see how the glazing turned out.  These are for Barbara and Geoffrey...  Thanks for your patience and I hope you enjoy your mugs!

Wednesday, March 16, 2011

Happy Results

The glaze firing turned out nicely! I'm quite pleased with my clay. Here are some of the pots:


I particularly like these mugs.


The Corral mugs, ready to be packed up:


Wednesday, March 9, 2011

Into the Bisque

Last Thursday, I put work in the Fairplay co-op, Coyote Creek Gallery.  When I checked in over the weekend, I was pleasantly surprised to hear I'd already sold a piece!  The more work I sell, the more space I have for my new pieces.  Here are some pots I set out to dry yesterday for this afternoon's bisque.

Bowls, mugs, tumblers, serving dishes.

The brown pieces are all slightly squared (except the bowl in the middle - that was my very first piece in the new clay, and it will be glazed differently than the others). I made tumblers, mugs (back left), bowls, and a serving platter.

Iris stamp


To accompany the new year and new clay, I also made a new stamp: a stylized combination of Siberian and Japanese irises that I hope will look nice under glaze. I plan to replace writing my name or initials with my stamp--except for the Corral mugs, below, which I've already stamped the side of, and I don't want to overcrowd. This new clay body has a lovely color when fired, and I'd rather leave the bottoms of my pieces simple.  The stamp is hand drawn, so that it has a uniqueness of a signature, but it allows me to express something other than just my name. At a workshop by Takashi Nakazato a few years ago, I was surprised to learn that the mark he makes isn't related to his name; it means "money" or "sell" or something like that. He is a businessman besides being an artist, and truly intends to for his work to be purchased.


The light-colored mugs are for The Corral, a condo complex on the South side of Breckenridge where I do property and HOA management (aka, my day job). I've found a lot of opportunity at work to involve my creativity, including overseeing the web site project, where you can also see the photo shoots I coordinated.  The President of the HOA saw my show last summer at the Breckenridge Theatre Gallery and asked me to hang my pit fired masks in the office, so there's art around me all day.


I'm quite happy with the stamp I made here. Usually, I free-hand (backward) any design or lettering for a stamp. This design posed a challenge in presicion, so I X-acto'd the logo from regular paper, moistened it only enough to stick to the clay, and about five hours later I had what I hoped would turn into a usable stamp. After the stamp was bisqued I breathed a sigh of relief. I wouldn't have the patience to replicate the stamp any time soon, so I'm extremely careful not to lose it or break it.

All right, enough time goofing off! Time to load the kiln. I'm not sure I have time to glaze before Monday, but if I can high fire these pieces next Tuesday, I'll post the results asap!

Friday, February 25, 2011

New Year, New Clay

After exclusively making clay from raw ingredients in college, I switched to store-bought clay about five years ago.  I miss the intimate process, squishing goopy mud through my fingers.  Clay in a bag is easy: Step one, open bag; Step two, cut off desired clay amount.  I don't need to know anything about it to use it.

For the past several months, however, I've been devastated by awful pitting in my glazes, the severity of the pitting oscillating between minor annoyance to such horrifying results that I tell my husband I never want to touch clay again.  After conferring with my clay group, the consensus was that I've simply had a bad batch of clay.  What?!?   How could my frustration and wasted time - months! - be due to "bad" clay?  In my limited experience, one only ruins clay through incompetence, and once you've ruined a batch of clay, there's a lot of motivation to be prudent and accurate in the future!  I don't know how professional clay-mixers test to ensure quality.  Every new clay purchase carries the disclaimer "Test each batch of new clay before using", but I assumed - wrongly, it seems - that this was a general warning for the one time in a million that something goes amiss.  Sigh.

I stopped by Mile High Ceramics two weeks ago, armed with renewed enthusiasm and two dear friends, and picked out a new clay, a darker body suitable both for hand building large pieces and for throwing.  Some clays that can support a lot of weight for larger projects have too much grog or sand that, on a quickly spinning wheel, rubs my hands raw.

Why a darker clay body? I know I don't like the naked color of most light clay bodies after they're fired. In college, I fired exclusively in reduction (propane or wood) and considered an electric kiln only as a handy tool to bisque my work. Once the glaze is applied, a reduction atmosphere draws oxygen from the clay and glazes, adding complexity and variance to an otherwise uniform surface.

There are ceramic artists whose work I adore, and who use an electric kiln exclusively. I, however, have never been satisfied with the results from my kiln, and perhaps it is because I stubbornly expect my work to look like it came out of a gas kiln!  Who knows how much I'll ultimately enjoy this new, darker clay body, but it's a step toward embracing the results from my electric kiln.


Here are some of the test results from my first round of glazing.  I met with the folks at Coyote Creek Gallery in Fairplay last week, and they want to show my work in their gallery (hooray!) including more colorful pieces than my usual earth tones.  I see only neutrals and blues here (the middle test piece was supposed to be more green), but there is good potential.  The middle glaze could go nicely with the nearly-black brown on the left.  Also, I'm curious to see how the second tumbler from the right (actually more of a burgundy-brown) works with the glaze next to it (also below). 
I like this glaze a lot.

Now that I've spent most of the day peering at my glazes, I have to decide what kind throw, and then I'll retire to my studio until dinner!

Sunday, January 30, 2011

Better Late Than Never

My New Year's resolution should have been something along the lines of "Don't abandon your blog." Here are the final photos for the series of posts I wrote in September. I'm not sure why I couldn't find time to post these in the last three months; or maybe it was the traveling, holiday enjoyment, and forgetting to take days off from my day job...

I think these photos turned out well.  The show was great, and I look forward to the next project!
Place setting: large plate, salad plate, covered bowl

Drinking vessel

Dessert bowls

Teapot